The Windows Research Kernel v1.2 contains the sources for the core of the Windows (NTOS) kernel and a build environment for a kernel that will run on x86 (Windows Server 2003 Service Pack 1) and amd64 (Windows XP x64 Professional) A future version may also support booting WRK kernels on Windows XP x86 systems, but the current kernels will fail to boot due to differences in some shared structures.
The NTOS kernel implements the basic OS functions for processes, threads, virtual memory and cache managers, I/O management, the registry, executive functions such as the kernel heap and synchronization, the object manager, the local procedure call mechanism, the security reference monitor, low-level CPU management (thread scheduling, Asynchronous and Deferred Procedure calls, interrupt/trap handling, exceptions), etc.
In this small blogpost, I will explain how to build WRK on Windows 10, there are some explanations online, however they where somehow scattered, so I decided to roll them up, also for me in case I wanted to do that again :p
Dependencies
- Visual Studio (I am using Visual Studio 2022)
Download and Copy to C:\Windows\SysWow64
Building WRK
A Copy of WRK can be found at
We will build a 32-bit version so launch x64_86 Cross Tools Command Prompt which comes with Visual Studio.
and Run Build.bat which is located at WindowsResearchKernel-WRK\WRK-v1.2\Build.bat
You will now have wrkx86.exe (the kernel) at
WindowsResearchKernel-WRK\WRK-v1.2\base\ntos\BUILD\EXE\wrkx86.exe
as well as
WindowsResearchKernel-WRK\WRK-v1.2\WS03SP1HALS\x86\halacpim\halacpim.dll
Patching The Kernel
First exercise the WRK Assignments propose is to modify NtQuerySystemInformation, so let’s do that to verify everything is working, I have made this modification which is the same as in the lab documents.

Now recompile, using Build.bat
Install Windows Server 2003 SP1
For that, I grabbed an iso from archive.org
https://dn710000.ca.archive.org/0/items/Windows_Server_2003_SP1.iso/
You will also need a product key, there is a collection of product keys on GitHub
https://gist.github.com/thepwrtank18/4456b1a4676a26c6ef25b8e8b70e26d7
I used D42X8-7MWXD-M4B76-MKYP7-CW9FD
Copy the Files
You can manually copy the files, if you enabled copy-paste in your VM for example by installing the guest additions in VirtualBox, however I used the method explained here, which works by creating an ISO which has all the files.
- Copy
wrkx86.exeandhalacpim.dlltoC:\System32in the VM. - Download and Copy DebugView to enabled see Debug Logs (
DbgPrint)
Configure Boot
- Start Menu > Control Panel > System > Advanced > Startup and Recovery (Settings) > Edit
And add the following line
multi(0)disk(0)rdisk(0)partition(1)\WINDOWS="WRK OS" /kernel=wrkx86.exe /hal=halacpim.dll /debug /debugport=com1
/debug and /debugport are important for debugging, com1 will be the serial port we use for debugging.
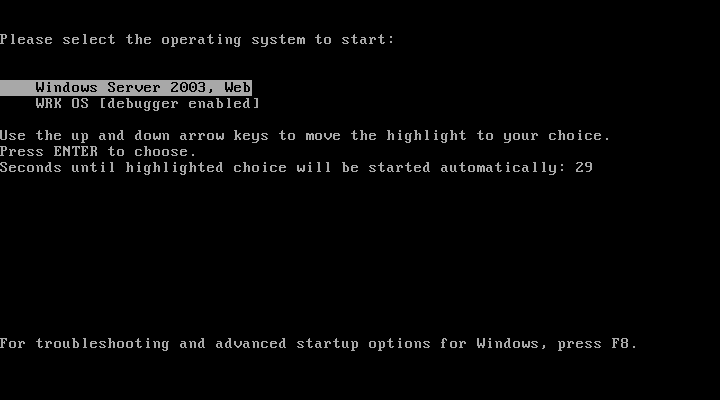
Now Restart and You should see, Choose WRK OS and Don’t Worry if its stays a Black Screen for a while :p
Debugging
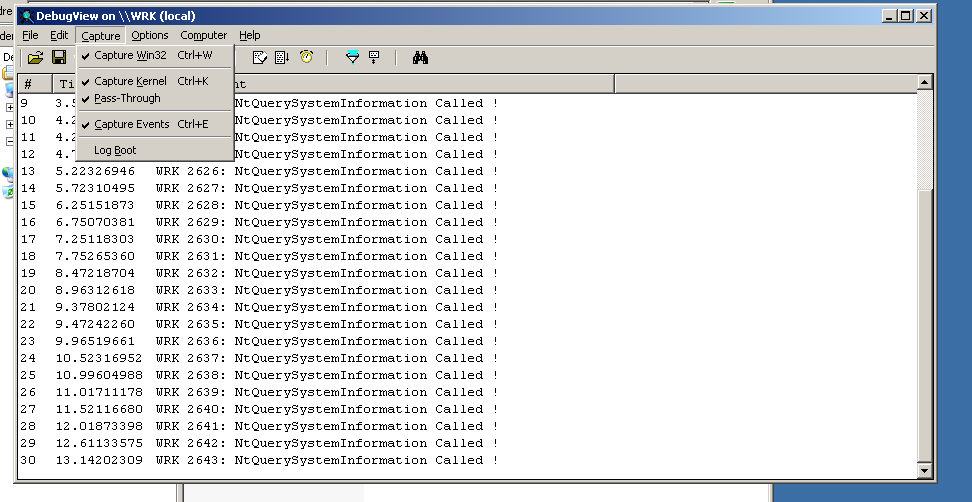
In DebugView make sure you enabled Capture Kernel and you should see ours logs !
For Windbg, we will use COM Serial Ports, I am using VirtualBox but this applies to others as well, in my case you can
- Right Click on the VM > Settings
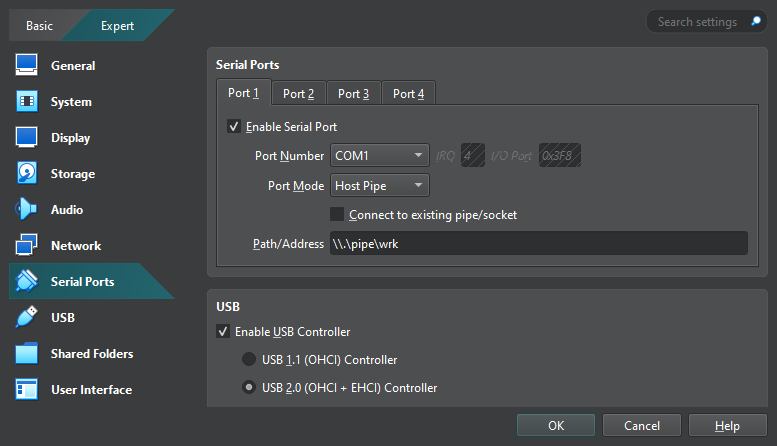
Remember we chose COM1 in the boot config, so it has to be COM1 here as well.
Download Windbg and
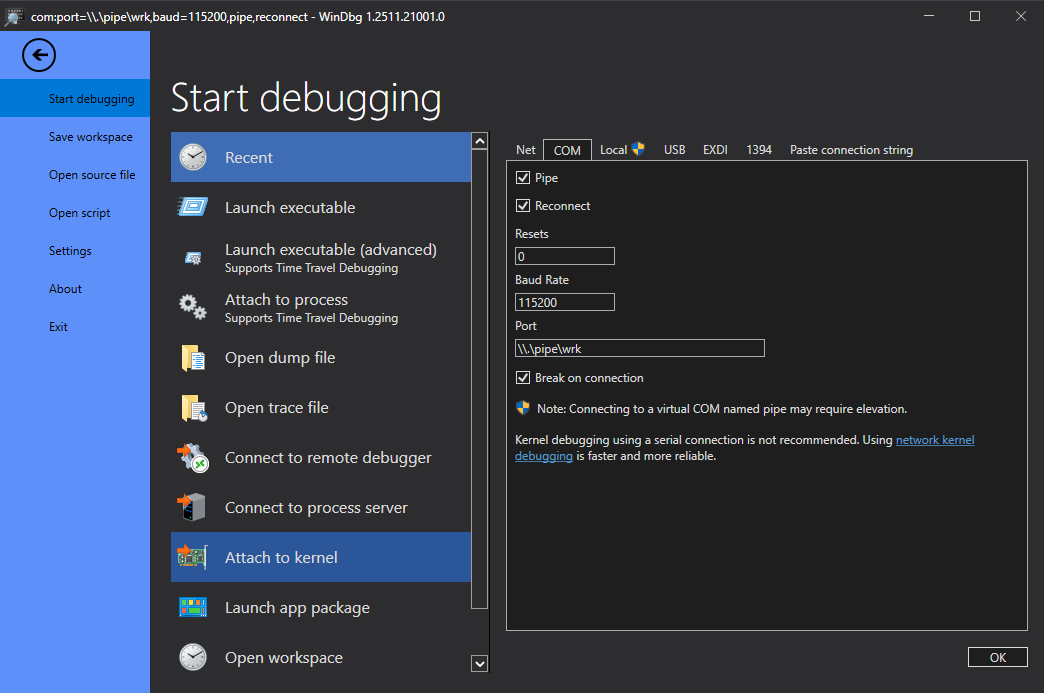
Now Click Ok, which should start the debugger, if it doesn’t connect immediately you can try to stop debugging and restart it again, after that you should see.
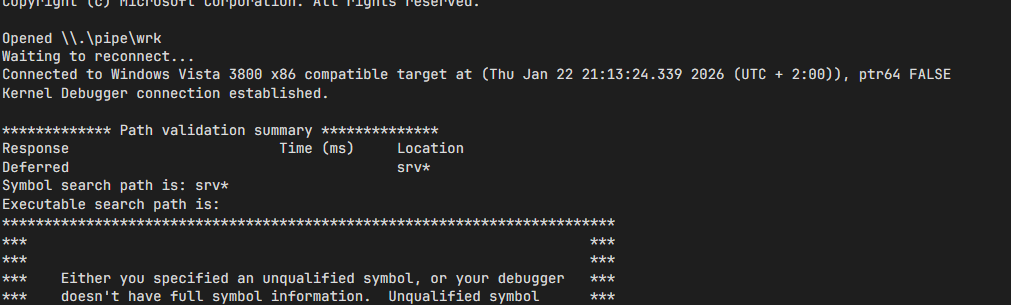
you can verify that wrkx86.exe is loaded using lm command
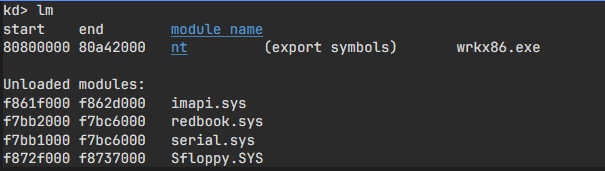
and if you entered g this should continue running the machine, and you should see the logs

References
Other Resources To Pair with WRK
That’s it.
~ ahm3dgg